PowerPoint has a suitable set of shapes that you can use for your presentation. There are squares, circles, triangles, pies, hearts, buttons, and so on – the entire list can be found on the “Insert tab” > “Shapes” ribbon.
But sometimes you want to make some kind of custom shapes and a custom PowerPoint template that will charm the audience at the presentation. One way to do this is to use the PowerPoint merge shapes feature.
In this article, we’re going to learn about shapes format. In that, we’re going to learn about PowerPoint merge shapes.
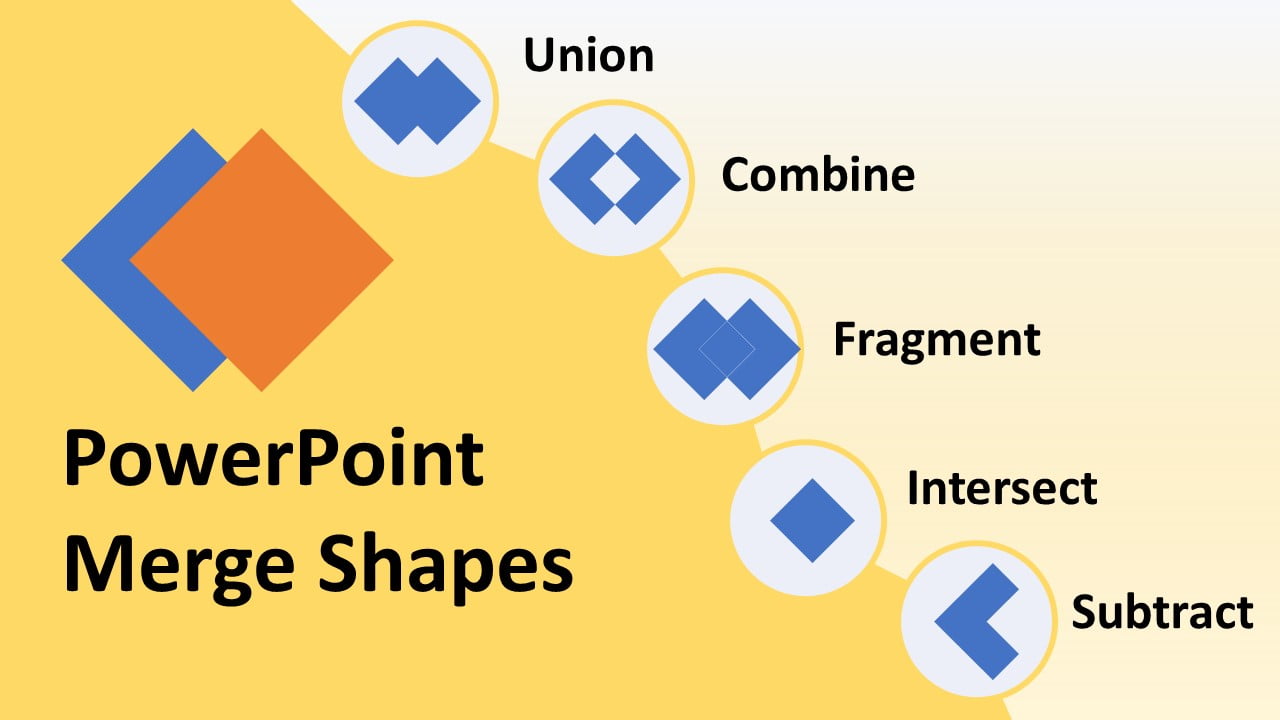
As you all know, the merge shapes tool provides five different options, that is-
- Union
- Combine
- Fragment
- Intersect
- and Subtract.
Here, I am going to explain each of the options and learn what exactly they do.
I will say that we can also use it in relation to pictures, highlighting interesting fragments from them and framing them into complex shapes.
How to build a shape using the Union function
Union is the first option on PowerPoint merge shapes. It is a pretty simple and straightforward shape. This option is used to Union two or more shapes into one single shape, but the important thing here is the sequence of selection of shapes.
I’m going to Union to two shapes that Shape A and Shape B into one single shape. I want to clarify the matter with some examples, so let’s get started.
Select those shapes first- (Shape A and Shape B). Here, my first selection is Shape A and the second section is Shape B.
1 Go to Drawing tool > Shape Format.
2 then go to Merge Shape.
3 and choose Union.
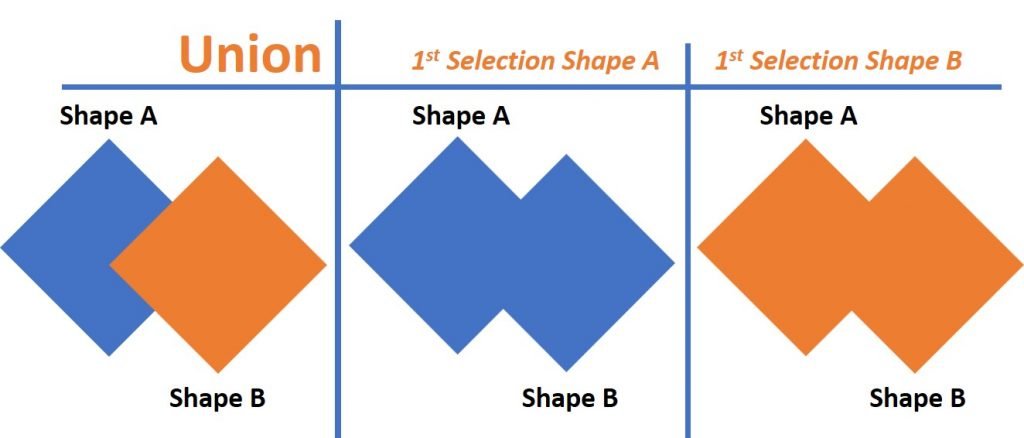
You will see the formatting of Shape A has been applied to all the other shapes after Union.
If we select Shape B as the first selection and Shape A as the second selection, this time you will see the Shape B has been applied to all the shapes after Union.
PRO TIP
So the key thing here is the formatting of the first shape that you’re going to select before the union will be applied to all the shapes after Union. The first shape is very important here.
Combine option on PowerPoint merge shapes
The second option is Combine, and what exactly this option does is when they were two shapes intersect or overlap with each other. It will remove the intersecting portion after the combined operation. And again, the sequence of selection of shapes is very important here.
For example, I’m going to combine these two shapes that Shape A and Shape B.
Here, I’m going to select Shape A as my first selection, Shape B as my second selection.
1 Go to Drawing tool > Shape Format.
2 then go to Merge Shape.
3 and choose Combine.

You’ll see the intersecting portion has been removed and the formatting of Shape A has been applied to all the other shapes after combining.
Alternatively, if you select Shape B as the first selection and Shape A as the second selection, then the intersecting person has been removed and the formatting of Shape B has been applied to all the other shapes after combining.
How to use Fragment tool in PowerPoint
The Fragment is the third option on merge shape in PowerPoint. You can use this particular option when you want to create an infographic, short designing infographics using PowerPoint.
It will create the fragment of shapes when two or more shapes intercepted or overlap with each other and again and again the sequence of selection of shapes is very important here as well.
For example, I want to create the fragment of Shape A and Shape B.
I’m going to select Shape A as my first selection, Shape B as my second selection.
1. Go to Drawing tool > Shape Format.
2. then go to Merge Shape.
3. and choose Fragment.
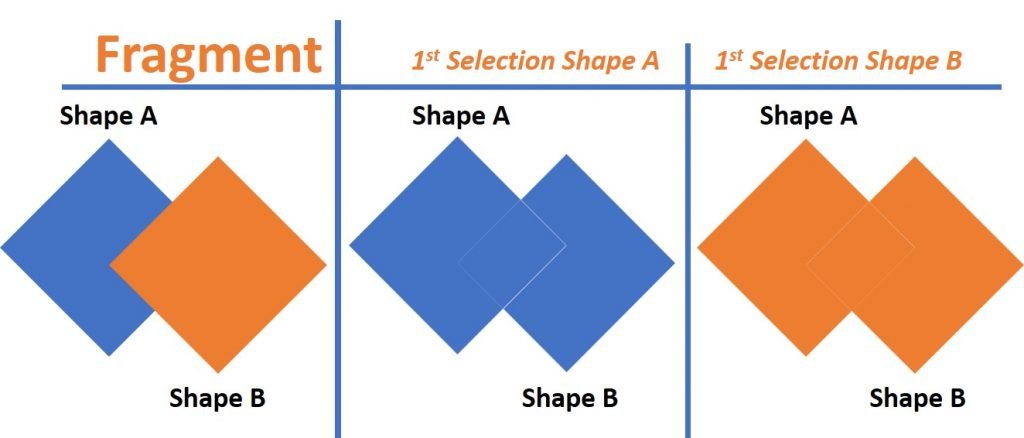
The first thing to note is here is the selection of the first shape that is “Shape A” format has been applied to all the fragments.
Here is another example, if you select Shape B as the first selection and Shape A as the second selection. So the format of “Shape B” has been applied to all the fragments.
How do you fragment an image in PowerPoint?
The Fragment is the third option in the PowerPoint merge shape group. An attractive image can keep your audience a little longer, which cannot be done just by writing.
Using the Fragment tool, you can create an awesome slide design for your presentation, infographic, social media post, banner, etc. You can follow the simple strategy to make this one.
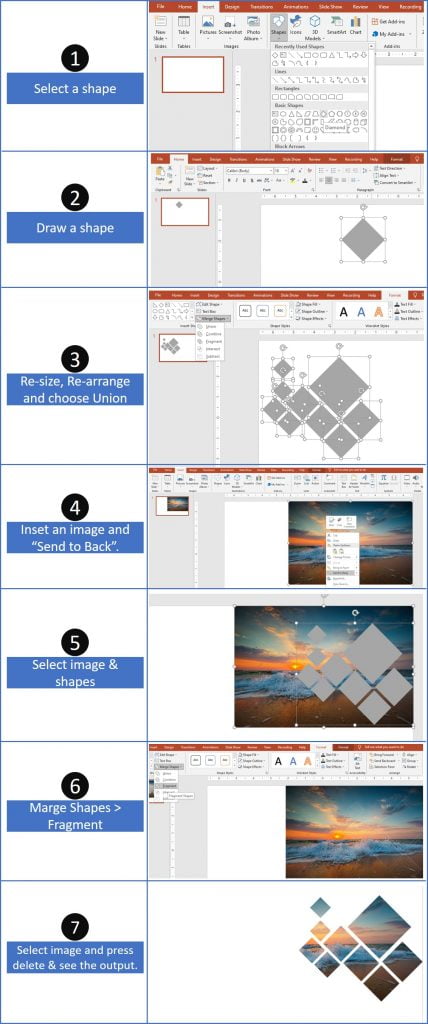
- Select a shape which you want (I’m using Diamond shape)
- Hold down the Shift key and drag to draw a shape.
- Select the shape and press “Ctrl+D” to duplicate them or “Ctrl+C” to copy and “Ctrl+V” paste for multiple shapes.
- Re-size them by holding the shift key and re-arrange them as per your requirement.
- After re-arrange select all the shapes and go to Drawing tool > Shape Format > Merge Shapes > choose Union.
- Choose and insert a picture on your hard drive or online on this slide.
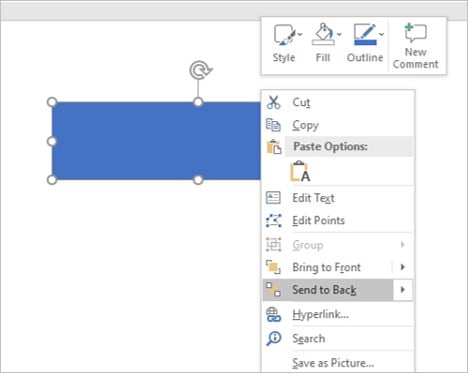
- Select this image as the first selection and Right-click > Send to back, then select those shapes which you want to fragment an image and then,
- Go to Drawing tool > Shape Format > Merge Shapes > choose Fragment.
- And then select the image and press Delete.
Intersect shape in PowerPoint
The fourth option is Intersect. It will create the shape of the intercepted person between two or more shapes and again hear the sequence of selection of shapes is very important.
For example, I want to create the interest between Shape A and Shape B and this particular portion is the common between Shape A and Shape B.
So I will select Shape A as my first selection, Shape B as my second selection, then
1 Go to Drawing tool > Shape Format.
2 then go to Merge Shape.
3 and choose Intersect.
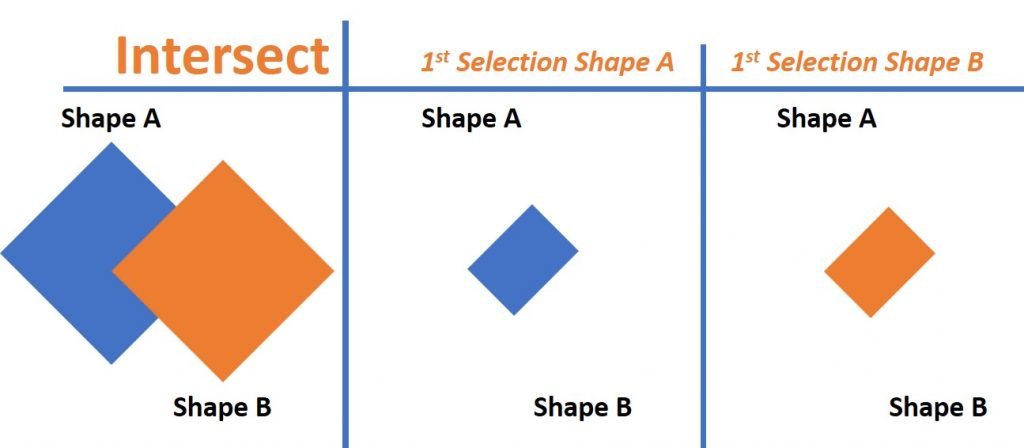
You’ll see the portion that was intersected in between Shape A and Shape B has been leftover as a brand new shape. And the color and the formatting of that particular shape will be Shape A, which we have selected as the first shape.
If you select Shape B as the first selection and Shape A as the second selection. So it has left the intersected portion and the format of intersected portion will be of Shape B, which was our first selection.
How you can convert text to shapes in PowerPoint
Do you want to create text logos in PowerPoint without having to use any other software, or use a fancy font in your presentation, you can do this easily by converting text to shapes.
There are two methods for convert text to shapes in PowerPoint. You find those methods in the PowerPoint merge shapes gallery.
- To convert individual letters, words, or paragraphs into a single shape, you need to use the Intersect method. Alternatively,
- If you convert individual letters, words, or paragraphs into individual shapes, you need to use the Fragment method.
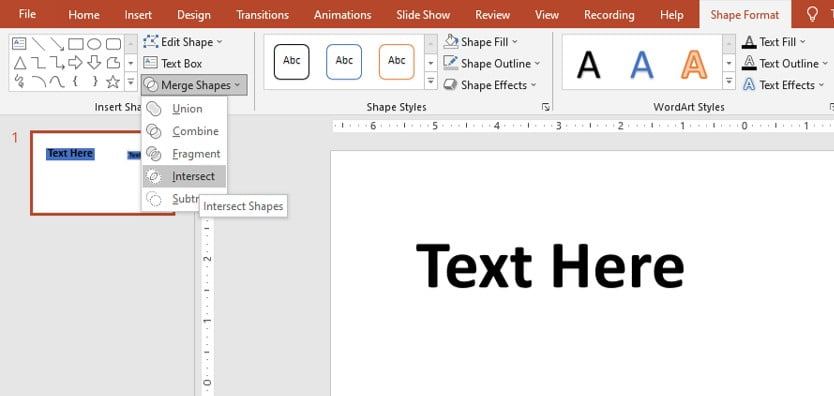
Here, I’m going to explain to you how you can convert text to shapes in PowerPoint through the Intersecting method.
1 Add a text box to your slide and type inside it, making sure the font, size, and color are all to your satisfaction, or choose any text box on your slide that already exists.


2 Insert a shape onto your slide, making sure it completely covers your text area.
3 Once the rectangle shape is inserted, the existing text box will be behind the rectangle shape. Then, select the rectangle and right-click on it, choose “Send to Back“.

4 Select the text box and then the rectangle shape.
5 It’s very important that you choose the text box first because the output shape will take the format of the first selection. Then,
- Go to Drawing tool >Shape Format.
- then go to Merge Shape.
- and choose Intersect.

6 Right-click on the converted text and click the Edit Points option from the context menu and re-adjust the points as you like.
Note:
If you don’t see the Edit Points option, that means your text hasn’t been converted into a shape yet.
How to subtract shape in PowerPoint
The last option on PowerPoint merge shapes is Subtract and again it is and straightforward as simple as that.
This option is going to subtract two or more shapes that we are going to select. And again, the sequence of selection of shapes is important here as well.
For example, I want to subtract Shape A and Shape B. The first shape that you are going to select will remain and the second shape that you are going to select will be subtracted out of the first shape.
So I’m going to make Shape A as my first selection and Shape B as my second selection, then
1 Go to Drawing tool >Shape Format.
2 then go to Merge Shape.
3 and choose Subtract.
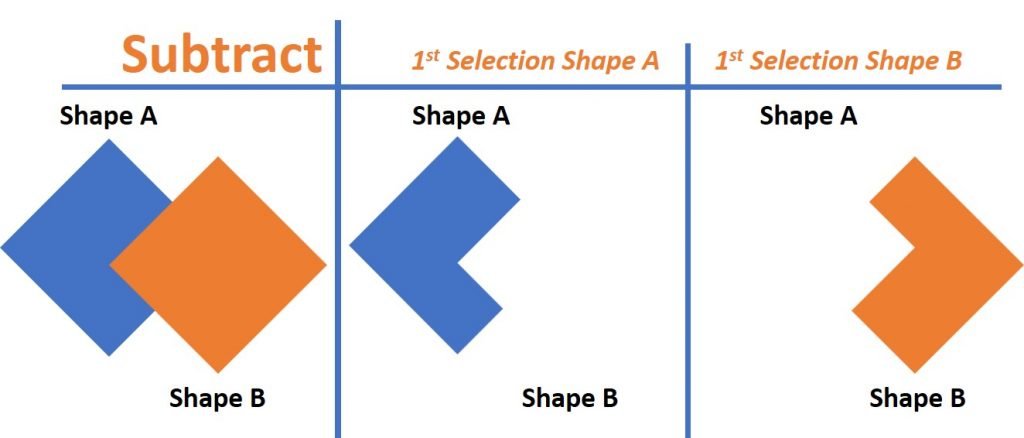
So the first Shape A will remain and the second selection that is Shape B will subtract the portion of the shape out of the first shape.
One more thing, if you select Shape B as the first selection, Shape A as the second selection, then the first Shape A will remain and the second selection that is Shape B will subtract the portion of the shape out of the first shape.