
Microsoft PowerPoint allows you to add many shapes to your presentation slides, including rectangles, squares, circles, and ovals. To define the relationship between the two shapes, you can insert some lines that connect them. These lines are called PowerPoint connectors, and it remains even if you move either of the shapes to another location on the slide.
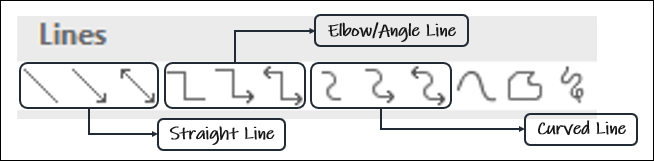
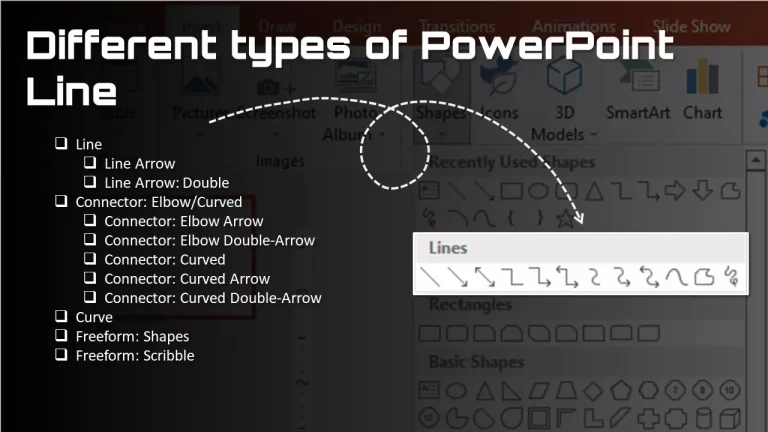
There are three types of connectors in PowerPoint:
- Straight Line Connector,
- Elbow/Angle Line Connector,
- and Curved Line Connector.
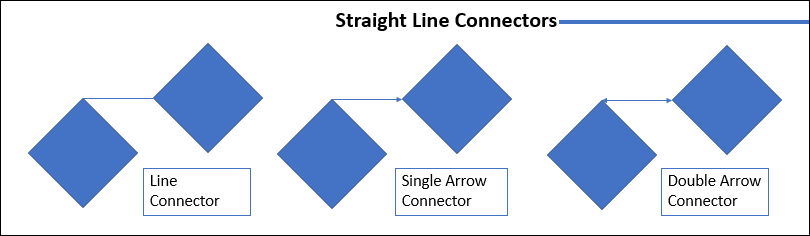
Straight Line Connectors
Straight connectors link two PowerPoint shapes or picture objects using a straight line or arrow. PowerPoint offers three types of straight connectors: Line, single arrow, and double arrow. Use a line to show an equal relationship, a single arrow to show a one-way relationship, and a double arrow to show a two-way relationship. Straight connectors are most useful with shapes that are placed side by side – either horizontally or vertically. Linking multiple related shapes or different objects together is a good example of how to use the line connector.
Elbow (angled) Connectors
Elbow (angled) connectors help to link two PowerPoint shapes using an elbow line, elbow arrow, or elbow double arrow. Similar to the way the arm bends at your elbow, an elbow connector bends at an angle to connect shapes instead of connecting them directly across. PowerPoint offers three types of elbow connectors: Elbow Connector, Elbow Arrow Connector, and Elbow Double-Arrow Connector. Use an elbow connector when the shapes you want to connect are not parallel.
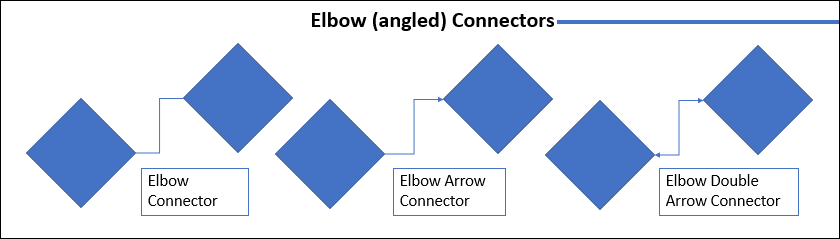
For example, you can use the elbow connector to connect shapes placed in different areas of a slide that illustrates a sequence or process.
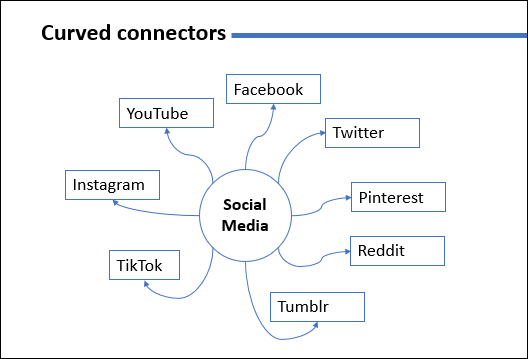
Curved Connectors
Curved connectors link two PowerPoint shapes using a curve line or arrow. PowerPoint offers three types of curved connectors: Curved Connector, Curved Arrow Connector, and Curved Double-Arrow Connector. Curved connectors are useful on blades with multiple shapes, where a straight connector could overlap or interfere with the text.
For example, if your slide contains multiple circles representing tasks that connect, you can use the curve connector to represent that relationship.
How to use PowerPoint connectors
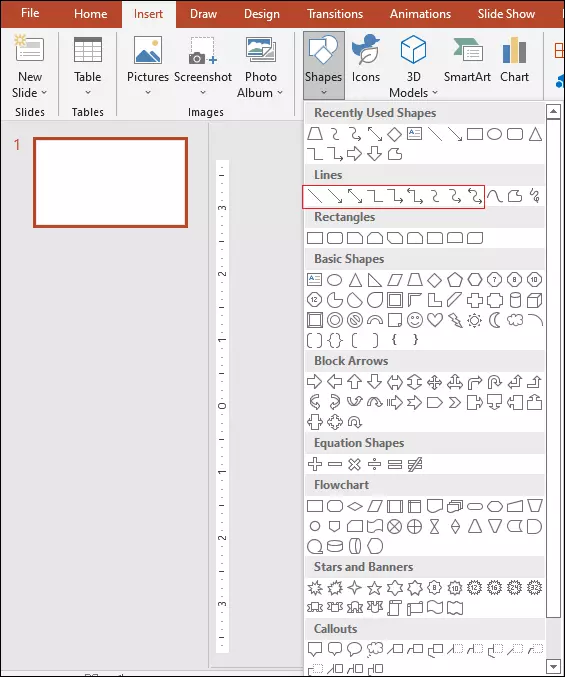
To use the PowerPoint connectors, first need two or more shapes (like- rectangles, squares, circles, or oval) which are available in the “Shapes” button in the “Illustrations” group on the “Insert” tab, or any picture objects.
Now we want to connect with them. To connector between two shapes or picture objects on a PowerPoint slide, click the “Shapes” button on the “Insert” tab. Select a connector you prefer in the “Lines” section in the “Shapes” gallery.
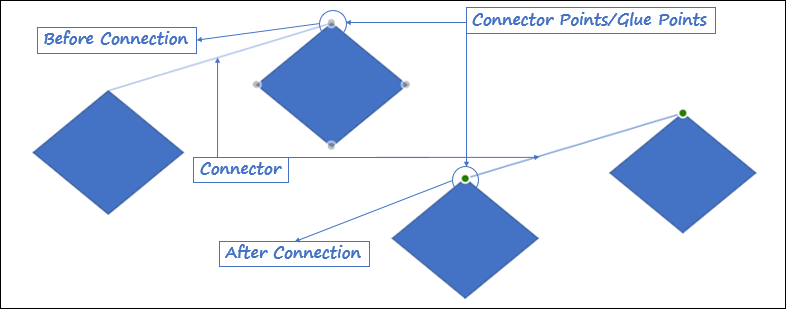
Hover your mouse over the first shapes or objects that you want to connect from. Some gray dots will appear around the shapes, called connection points or glue points. Drag your mouse from a connection point in the first shape to a connection point in the second shape to connect. Now the two shapes are connected.
To delete a connector, select it with your mouse and press the “Delete” key on your keyboard.
We are trying to complete the main points of this article at the top. Hope it will be more helpful to you. Some other things related to this topic that we are going to explain below, that you can “skip” if you want.
How to add extra connector/glue points to a shape in PowerPoint
Following the below step, you can add an extra connect point to a shape.
Step 1. Right-click on the shape.
Step 2. Choose “Edit-Points“.
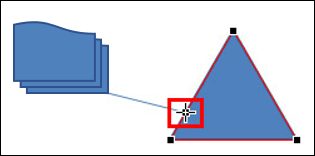
Step 3. Left-click where you want the new point (cursor changes to a cross-shaped square).
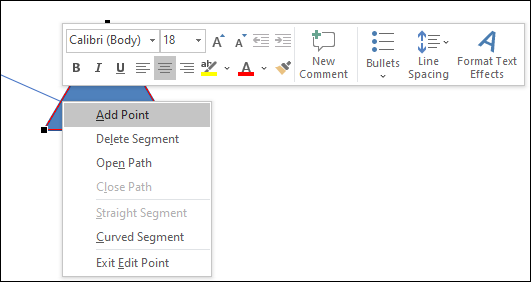
Step 4. Right-click at the same position without moving the mouse and select Add Point.
How to draw the same line or connector multiple times in PowerPoint
Using the Lock Drawing Mode, we can draw the line or connector repeatedly, to do so quickly follow the below process:
1. Click “Shapes” in the “Illustrations” group on the “Insert” tab.
2. Right-click the line or connector you wish to create under the “Lines” segment, then select “Lock Drawing Mode“.
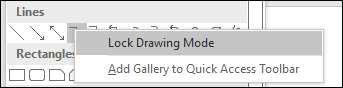
3. Drag the cursor from where you want to start the line or connector to where you want it to finish.
4. Step 3 should be repeated for each additional line or connector you want to add.
5. Press “ESC” when you’ve finished inserting all of the lines or connectors.
How to Adjust a Connector in PowerPoint
If you want to adjust your PowerPoint connector to make it fit properly between the two shapes on your PowerPoint slide. Let’s click your PowerPoint connector to select and follow these techniques to adjust it:
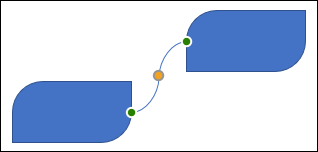
Change the shape of a connector
Drag the yellow diamond on the connector. As you drag, the connector assumes different shapes.
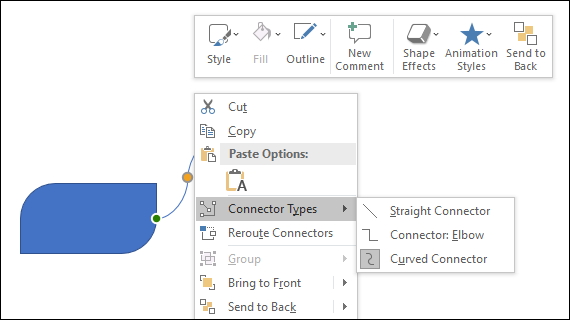
Change connector type
Click on the connector, choose Connector Types and choose Straight Connector, Elbow Connector, or Curved Connector from the submenu.
Handle arrows on connectors
If the arrows on the connector aren’t there, are going in the wrong direction, or shouldn’t be there, click the “Shape Outline” button under “Shape Format“, choose “Arrows“, and select the arrow you want.
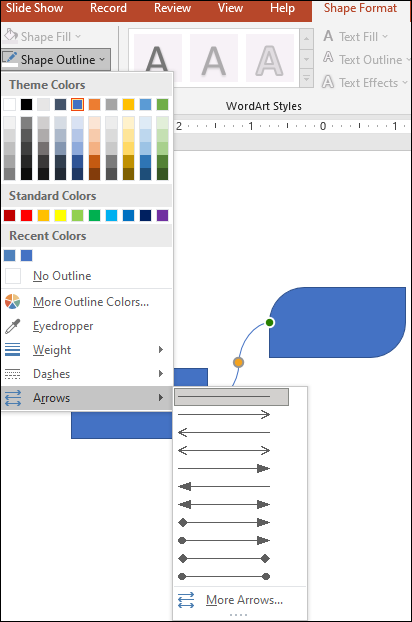
Also, you can change the color, style, and line width of a connector: click the “Outline Shape” button on the “Shape Format” tab.
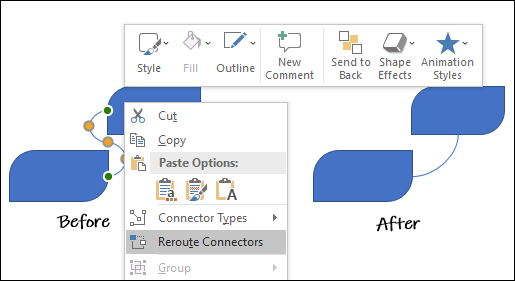
Reroute Connectors in PowerPoint
Reroute connectors is helps to find the shortest path between two connected shapes, which are connected by connector lines.
To find the shortest path between two objects, select the connector line, then right-click on it and select the Reroute Connectors from the context menu.


An interesting blog, it gave me knowledge.
It’s very troᥙble-free tօ find out any topic on web as compared to textbooks, as I found this paragraph at this site.
Very energetic blog, Ӏ loved that bit. Will there be a рart 2?