The PowerPoint slide master is a practical means of uniformly editing the slides of a presentation. Using the slide master not only saves you time, but it also allows you to create a well-structured and impressive presentation with little effort.
What is the PowerPoint slide master?
A presentation design should always be identical so that a simple idea emerges and we can convey content in a complementary way.
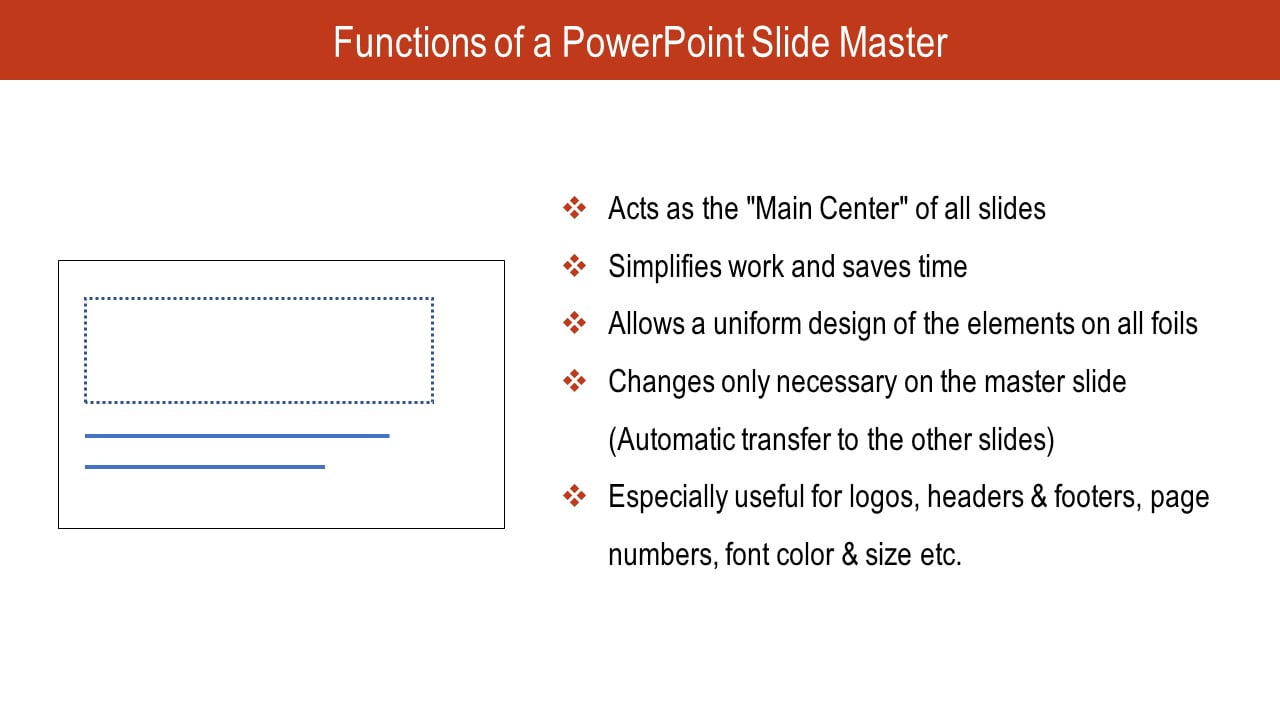
We can see the PowerPoint slide master as the center of the presentation slides, in which such a uniform design is possible. In short: the slide master is nothing more than an individual design template.
Basically, we create a slide master for using all other presentation slides without having to re-configure all designs and settings.
In this way, we can ensure that, for example, the font and size, the color design, or placing a logo remains identical on each slide. We determined these settings once during the master slide creation. This saves you the boring step of designing each slide individually with the same formatting options.
Where is the PowerPoint slide master?
We can edit PowerPoint presentation slides either in normal mode or in the master slide view. To open the slide master, do the following-
1 Open the View tab in the top bar of PowerPoint.
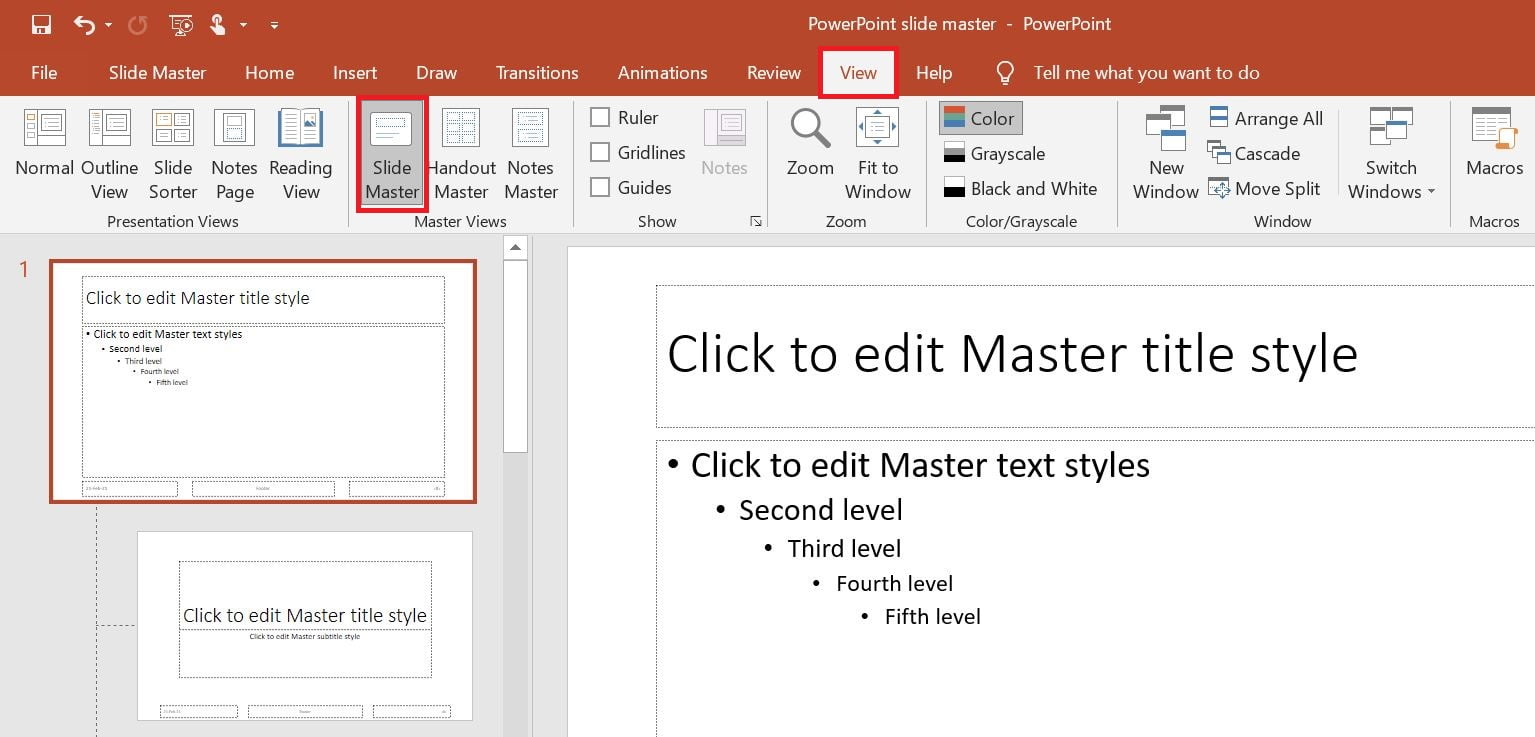
2 In the Master Views group, select Slide Master.
3 The slide master now appears on the left in the topmost slide thumbnail window. The layout master of the related slides is located under slide master.
If you edit the slide master, carry over the changes made to all other slides based on the slide master. In edit mode of the normal view, you cannot change the defined elements in the master and you can only edit in the slide master.
tips
In the normal view of PowerPoint, if the image cannot move or we cannot change the font of any text, because we defined it as elements in the slide master and can only change there.
It is best to edit and set the slide master before creating the individual slides. The slides can then adopt the user-determined settings. If you edit the slide master afterward, change the slide layout of the previously created slides again in normal view.
To edit slides individually in layout master, go back to the normal view of PowerPoint.
The layout master of PowerPoint
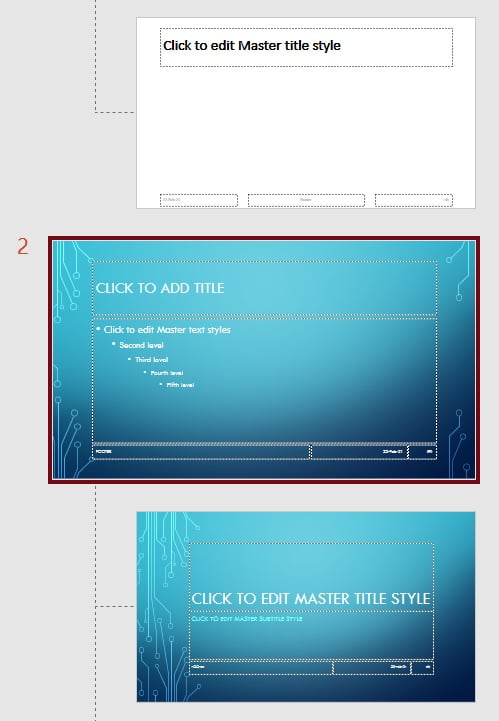
The layout master is located below the slide master. We can manage here the layout of all slides. Most changes to we usually make the slides using the layout master. There are different layouts for several structures.
Each slide master has an associated slide layout. Depending on the design chosen, the templates for the layout vary. Some are good for text significant content, others are ideal for images and animations. Each template has different placeholders that can be filled with content. Placeholders are located and measured individually. You can also change and adjust the placeholders as desired.
We can use each layout template exactly, but it can adapt to your needs individually. However, the layout of individual slides must be edited in PowerPoint’s normal view.

1 To do this, select the View tab.
2 In the Presentation Views group, click the Normal field. You are already in the normal view of PowerPoint and can change the layout of the individual slides as desired. For example, placeholders or the like.

The handout master of PowerPoint
PowerPoint also gives you the option to edit the appearance of presentation handouts. Handouts are printouts of the presentation that we can distribute to viewers.
The handout master is used to process these handouts. Headers and footers, the background, and the layout of the note can adjust.
Any changes built to the handout master automatically appear on all printed pages of the handout.
1 Open the View tab for the handout master.
2 Select the Handout Master field.

From here you can determine what the handout should look like – be it the format, how many slides will appear on each page, or the addition of company logos or company names.
The note master of PowerPoint
With PowerPoint, we can also create note pages during the creation of a presentation, which can later aid when carrying out the presentation. For the general design of these note pages, PowerPoint offers a master slide that can define uniform formatting for all note pages.
1 To activate this master view, select the View tab.
2 The Note Master field appears in the Master Views group.

The master view of the notes master is already activated and we can edit the notes as required and uniformly for all note pages.
Use different slide masters in PowerPoint
If you want to use PowerPoint design templates within a presentation, you also need several slide masters. Each design has its own master with a subordinate layout.
How to add another slide master:
1 In the View tab, go to the Slide Master field, the view so enabled in the Slide Master mode.
2 The option Insert Slide Master appears in the Edit Master group.
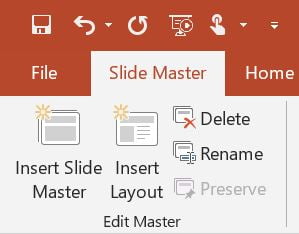
3 Another slide master appears under the existing masters. The new slide master does not yet include a design, this can select again later.
There is also the possibility to insert a new design in the additional slide master. We can also find this option in the Slide Master tab in the Edit Theme group under Themes.

If you select a theme here, a new slide master with the new theme will appear under the existing slides.
Apply & change the PowerPoint slide master
If we activate the slide master view, the slide master can now be edited. We can adjust again and again while creating a presentation, and we automatically change the associated slides.

The slide master is the first and largest slide of the thumbnails on the left.
Everything that is set on this slide is also adopted accordingly on all other associated slides.
For example, if we insert green text as a heading in a certain font, the headings of the other slides also appear in the same font in green.

The slide master is therefore the best place to define and set basic formats such as font, font sizes, bold, italic, underline or footer elements.
How to edit PowerPoint slide master background graphics
In the PowerPoint slide master, you can easily create a picture or texture background style or create a gradient background style flow this guide. It can appear on every slide or in certain slides in the presentation.
Also, you can add a watermark as a company logo that you want to include on every slide. To apply a picture or texture or a gradient background style, you can follow this instruction:
1# To Select Slide Master
Click the View tab and then click the Slide Master. At the top of the thumbnail panel on the left-bar, you can see a list of pre-made slides. Select which you want to edit. You will apply the edit made by this selected master to a specific slide with a uniform layout. Meanwhile, the change between slide number 1 in that list applies to all slides in your presentation file.

2# Choose Format Background
After selecting the slide, click the Background Styles drop-down arrow button and then click Format Background, which is available in the Background group under Slide Master.

3# Insert Background Image
Click the Picture or texture fill button, if you want to add pictures or graphics click the Insert button and you can see three sources here (1. From a File, 2. Online Picture, 3. From Icons), click on any one and select a picture.

4# Edit the Background Graphics
Go to the Format Background panel to create a watermark effect and slide the Transparency bar to the right to adjust the percentage of opacity.

Create a Gradient Background Style
- To change the selected slide master background, click the View tab, and then click the Slide Master.
- Click the Background Styles button and then click the Background Format button.
- To display the available fill effects, click the Gradient fill option.
- Click the Preset gradients icon and then select a style of color.
- Click the Type list arrow, and then select a type: Linear, Radial, Rectangle, Path, or Shade from title.
- Click the Direction list arrow, pick a direction, and then insert an angle.
- Add or Remove Gradient stops, select a color, and then drag the Stop position slider to define a percentage.
- To determine a percentage, drag the Transparency slider.
- Select or clear the Rotate with shape check boxes as needed.
- To apply the fill effect to all slides, click Apply to all, or click Close Master View to apply only to the selected slide or slide master.

Edit headers & footers in the PowerPoint slide master
Headers and footers should have the same layout formatting on all slides within a presentation. The format for this can determine in the slide master and thus adopted uniformly on all slides. In order to standardize the headers and footers of all slides, we must activate the slide master view first.
1 Select the thumbnail view of the slide master with the mouse.
2 In the slide master, there are boxes at the bottom of the slide which are present in the footer of a slide- for example, the date (1), a footer (2), or page numbering (3) can be entered here. So you can enter any text here.
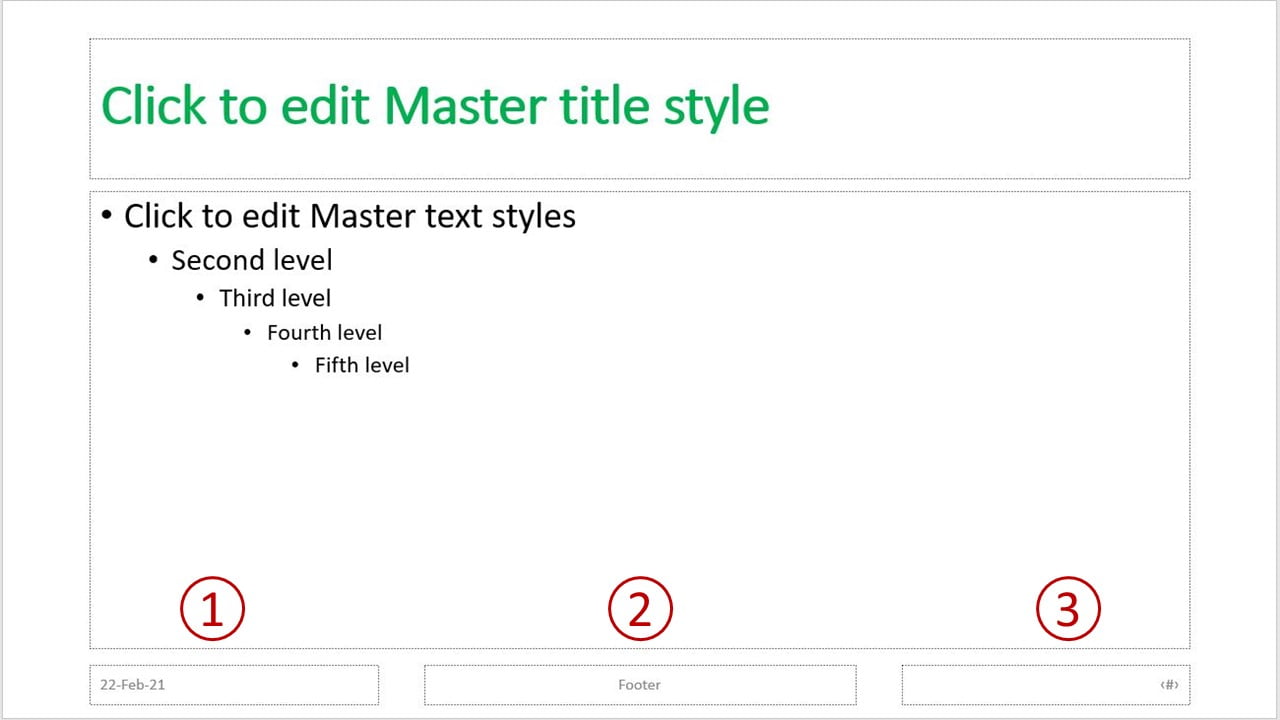
3 Open the Home tab and apply the required formatting (such as- font, color, font size, etc.).
4 To normal view return. We have now applied all changes.
How to add page numbers in PowerPoint slide master
Use the slide number feature with Slide Masters to control which slides show slide numbers if your presentation has multiple slide layouts.
You can follow these guides to enable slide numbers in your presentation using PowerPoint Slide Master.
1 On the View tab, click Slide Master in the Master Views group.
2 Select the slide master in the Slides pane or choose the slide layout that you want to show the numbers.
3 Click Header & Footer on the Insert tab.
4 Mark the check box in Slide Number.
5 Click Apply for applying the number to only a selected slide layout. If you want to apply numbering to all masters and all layouts, click Apply to All.

Conclusion
The slide master of PowerPoint serves as the center of all presentation slides, from which changes for all slides can be made at once.
PowerPoint offers the function of the master view for slides, notes, and handouts, which all enable a uniform design of the respective slides or pages. Nothing stands in the way of the effortless creation of a manageable but exciting PowerPoint presentation.

[…] on the screen, to switch to template editing mode, on the “View” tab, click the “Slide Master” button. On the left is a thumbnail area that contains master and slide layouts with […]
[…] you need to add an image to all slides, then the best practice is to insert it into the Slide Master, then the image will be an element of the slide design and you will not have to insert it […]